Crafting a Hollow Wood Surfboard from Old-Growth Redwood
There are any number of plans and templates and techniques available online these days, however, I have never had the right set of circumstances to undertake such an ambitious project. That was until last summer when, after working as a videographer and photographer at Camp Thunderbird in Minnesota, I had the remarkable opportunity to begin making "The Redwood Thunderboard", thanks to my good friend Bill Wilson, the maintenance manager of the camp.
Bill kindly gave me free reign in his perfectly equipped workshop and he also suggested I "harvest" the material for the project from discarded camp sailboats. The boats were handmade in the 1950s by the-then maintenance manager, Arnold. After toiling a few planks off the old boats with a claw hammer, crowbar and some cussing, I found that the wood was as clean and good as ever, even after over 70 years of weathering in the North Woods.
I set to work in the fall and it took about two months to get the basic form of the board together and finished, before the harsh Northern winter set in and it was time to decamp to the sunnier climes of Southern California, where I was able to finish up with fiberglass and set my board to water.
Here are some photographs illustrating the journey. As Grain perfectly put it: "We love building surfboards. The process, the tools, the material, all come together to give a great sense of satisfaction. It’s the process that we’re passionate about—a process that's thoughtful—with sustainability, longevity, quality, and awesomeness built in."
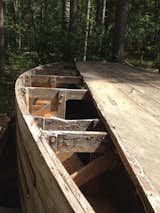
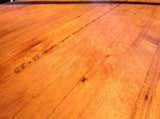
These sailboats were handmade at Camp Thunderbird in Minnesota in the 50s from old growth Redwood—making it about 70 years old now.
The first task was carefully to prize off as many strips of Redwood as I could, without tearing them too much, and remove any nails and screws.
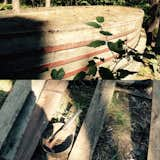
Some running repairs to get planks ship-shape again.

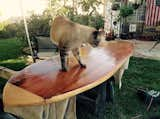
This guy—I named him Chuck—kept me company from time to time as I "toiled" cleaning up the lumber under the beautiful North Woods sun, surrounded by tall, whispering pines. Nice work, if you can get it.
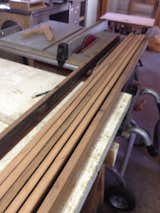
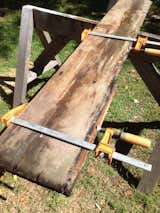
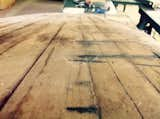
Once clean, planks were re-sawn on a table saw to get about 2 inch wide strips, then re-sawn again so that they were about a quarter inch thick.
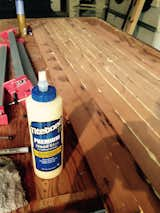
Titebond II to laminate the thin strips together for the top (deck) and bottom layers of the board.
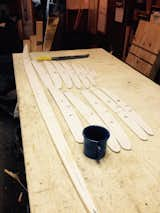
Meanwhile, the shape of the board comes from these ribs, cut from a template downloaded off the Internet, printed to paper and glued to a plywood board. It's not easy to find free, effective templates. Your best bet is to buy one, from about $100, from pros such as www.grainsurfboards.com . I had to modify and tweak the downloaded design here, aiming for a 6'2'' single-fin that's very wide at 22'', for easy paddling and stability.
The "stringer" is the backbone of the board. From this comes the all-important "rocker", the degree to which the board curves from nose to tail. This looks good, the final product though has less than desirable rocker. It came out very flat, making the board prone to nose-diving. A lesson learned for the next one.
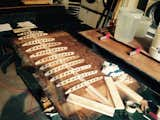
Assembling the ribs to the stringer to form the "skeleton". (See the low-tech clamping technique in the background—bins of water to add weight to the gluing process).
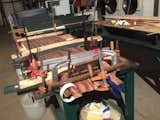
Clamping the deck and bottom to the skeleton by all means necessary—threaded rods, G-clamps, strips of PVC pipe, and later, those water bins on top.
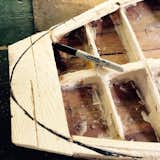
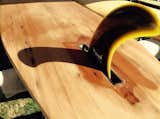
Detail showing the outline of the tail shape. I used strips and blocks of white pine and spruce for the tail and nose, also the "rails"—the edges of the board.
Taking shape.
The rough cut.
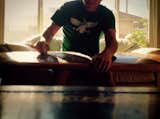
After many hours of belt and orbital sanding, especially shaping the rails, things start coming together.
The all important stringer autograph. This went through a few iterations before glassing.

Before shaping the nose. The small hole in the deck allows for a screw-in plug later, necessary to vent air from the hollow core after each surf. Air trapped inside the board expands with heat, creating pressure.

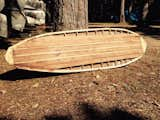
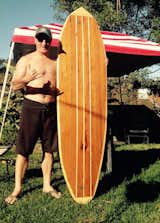
Shaped and ready for glassing. I didn't settle for the Thunderboard logo in the end.
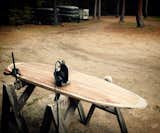
I set up shop in the backyard of good friends Lisa and Donny in Newport Beach, CA for the next steps—fiberglassing. I was fortunate enough to enjoy a good 3 weeks of sunny skies and 70 degree heat. It's not ideal to glass outdoors, and proved a difficult process. The glass didn't quite dry properly and came out rather rough, but I was happy to finish up. This is a removable keel fin by Maisch that came along for the ride all the way from South Africa.
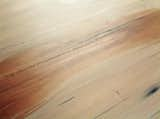
The fiberglass really brings out the best of the rich orange Redwood.
Leo inspects my handiwork. As you can see, the glassing is rough; many hours of sanding are now required but I was very eager to baptize "my baby".
One stoked shaper.
Waxing up in Long Beach.
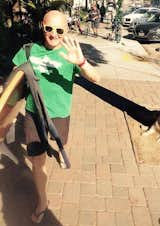
Main Street, Seal Beach, California.
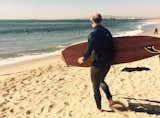
The surf was very small, perhaps the ideal conditions to take a test ride.
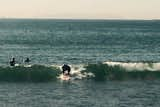
Paddling in, standing up.
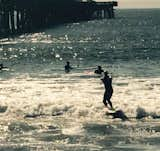
It goes!
Published
Last Updated
Get the Dwell Newsletter
Be the first to see our latest home tours, design news, and more.