How to Oil Your Floorboards
Oils and waxes penetrate into the wood fibers and protect from within. Most oils and waxes are nontoxic, hypoallergenic, and easy to do minor repairs with. You’ll need to reapply every one to two years. They are not as shiny or durable as other finishes. Apply oil only to freshly sanded floor.

Wearing rubber gloves, apply the oil, starting from the corner of the room farthest from the door. Apply an even layer of oil all over the floor, using a wide floor brush or paintbrush. Use a small paintbrush for edges.
YOU’LL NEED:
You may need two or three additional applications, depending on the manufacturer’s guidelines. Before applying more coats, remove any nibs or dust.
STEEL TAPE MEASURE
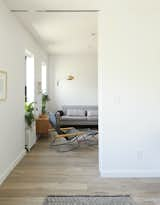
Before you get started, check out wood flooring ideas from the Dwell archive.
WOOD OIL, SUITABLE FOR FLOORS, TO COVER AREA, PLUS EXTRA BROOM, MOP, AND FLOOR CLEANER
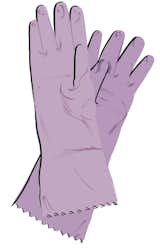
RUBBER GLOVES
WIDE FLOOR BRUSH
SMALL PAINTBRUSH, FOR EDGES
LINT-FREE CLOTHS
RAGS OR OLD CLOTHS
WOOL OR SANDPAPER AND BLOCK
TOOL UP:
POWER SANDER
TOOL DOWN:
FINE-GRADE WIRE
Stay Safe
Oil-saturated cloths can spontaneously combust as the oil cures. Place in water after use, then dispose of carefully in a sealed metal container filled with water.
Getting Started
Measure the room to calculate the area to be oiled. Check the oil can for guidance on coverage and remember to buy extra if you are applying more than one coat.
Make sure the room is well ventilated. Remove all furniture. Always read and follow manufacturer’s guidelines. Wear old clothes. Floorboards should be clean and dust-free.
What to do
1. Wearing rubber gloves, apply the oil, starting from the corner of the room farthest from the door. Apply an even layer of oil all over the floor, using a wide floor brush or paintbrush. Use a small paintbrush for edges.
2. Let the wood absorb the oil for 20 minutes.
3. Add more oil if the floor is very absorbent and wait another 20 minutes.
4. Buff the oil into the wood using lint-free cloths.
5. Use rags or old cloths to wipe all remaining oil from the wood.
6. You may need two or three additional applications, depending on the manufacturer’s guidelines. Before applying more coats, remove any nibs or dust. You can do this very lightly with a power sander, or with very finegrade wire wool or sandpaper. Wipe over with damp cloth and allow to dry thoroughly.
7. Do not walk on floor for 12 hours after final application.
How to Nail It!
• UV oil is a good choice if you are looking for more durability. It imparts a warm, natural look and has the durability of a lacquer.
• To keep your floor looking at its best, make your own floor polish by mixing equal parts olive oil and white vinegar. Add drops of lavender, orange, or lemon essential oil and use spray bottle to apply.
Excerpted from DIY Home Repairs: 100 Fix-It Yourself Projects Copyright © 2014 Sarah Beeny and published by Quadrille Publishing Limited / F+W Media, Inc. Used by permission of the publisher. All rights reserved. Design and layout © 2014 Quadrille Publishing Limited.
Published
Last Updated
Get the Dwell Newsletter
Be the first to see our latest home tours, design news, and more.