A Step-by-Step Guide For Removing Wallpaper Like a Pro
We love the bold, graphic nature of wallpaper, but it can be a real challenge to remove when trying to update a room or swap out an existing design for something new. But, don't panic—thanks to the step-by-step guide below, we're breaking down everything you need to know from start to finish. All you'll need to bring forth is a little elbow grease.
1. Pick Up the Right Tools.

Even if you're removing wallpaper on just one wall, it's important to have the right tools ahead of time, which will ensure that your project goes as quick and smooth as possible.
As with any DIY project, make sure you have the right tools to set yourself up for success. This means getting together your drop cloth, sponges, a ladder or step stool, trash bags, and any extra tools you might end up needing, such as scoring devices or a wallpaper steamer.
2. Prep Your Space.
When it's time to prep your space, you'll also want to turn off power and remove switch-plates so that you can safely access every square inch of the wall. Since the area will be getting wet, the last thing you want running through a damp wall is a live electrical current. Therefore, turn on work lights to make sure the space is still adequately lit.
Like painting a wall, removing wallpaper requires a fair amount of prep work in order to achieve high-quality results. For instance, you’ll want to cover the floor and baseboards around the wallpapered area by using painter’s tape to attach the drop cloth to the baseboard.
It is also a good idea to clear out any nearby furniture that might be impacted, while also taking the time to remove pictures, as well as any attachment nails or other hardware.
3. Conduct a Test Patch.

It is always a good idea to prime the walls before wallpapering. That way, if you ever decide to remove the paper, you will be less likely to damage the wall/drywall finish.
Because wallpaper installation technology has changed over the decades—and you may not know how it was originally installed—we recommend testing out a patch in a less conspicuous place to see how much difficulty you’re going to have.
4. Let the Stripping Begin.
Once you have seen the results of your test patch, here comes the fun part.
Depending on how old your wallpaper is, and how well it’s been installed, you might be able to strip off the pieces that are already loose, specifically near dry edges or vulnerable corners that have already lifted off the wall.
5. Steam and Scrape Away.

The basic idea behind removing wallpaper is to remove the paper first and then the adhesive second, without damaging the wall or the paper that makes up the finished layer of drywall.
To loosen the paper and glue from the drywall or plaster, you’ll need to moisten the material with hot water that is either sponged, sprayed, or—in particularly difficult cases—steamed on. You can use a wallpaper scraper, a metal spatula, or a putty knife to scrape off the paper and glue as they moisten and soften.
6. Score the Wallpaper For Quicker Water Saturation.
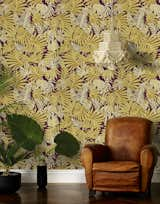
Custom wallpaper, made by Joana Avillez and Payton Turner, offers whimsical illustrations of significant historical female figures who worked for social change.
Most professionals recommend using a scoring device to lightly etch your wallpaper, making it easier for hot water to penetrate. While this isn’t necessary for all types of wallpaper, it can help with particularly thick, metallic, coated, or plastic papers, and even make the process go smoother and faster, regardless of material.
7. Steam, Scrape, and Repeat.

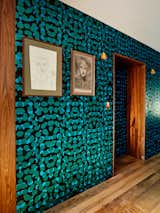
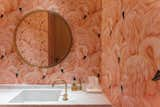
Lacquered wallpapers bring a vibrancy of colour to the bathroom.
Normally, it should take about 15 minutes for hot water to work its way into the paper and glue, causing the wallpaper to start to bubble and loosen from the wall. When you see this start happening, that’s your cue to get started. We recommend working in sections—start to scrape the paper, backing, and glue off, and take breaks as needed.
8. Steam Away Pesky Patches.
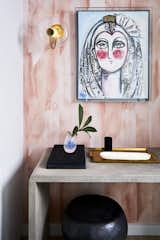
Modern entrance art and framing with a modern sconce and wallpaper.
You may find some areas are harder to scrape—or less relenting—than others. If that’s the case, consider renting a wall steamer to really amp up the moisture and heat. It can also help to add laundry softener or vinegar to the water, which some say helps dissolve and further softens the glue.
9. Wipe Down Your Walls.
When looking for final traces of glue, you should be able to identify them, as leftover glue will have a tacky, sticky texture, and a bit of dark sheen to it. Don't fret if you do spot remaining traces—these can be removed with various mixtures of hot water, dish soap, vinegar, baking soda, and fabric softener.
Once your walls are free of paper and glue, you’ll want to go back over the surfaces—particularly in corners and edges—with a wet hot sponge to remove any final traces of glue.
After all the glue has been removed, give your walls a final wipe down with a damp towel or rag, and wait a few days for the walls to completely dry before any painting or applying a new wallpaper.
Have any of your own tips about removing wallpaper? We’d love to hear them!
Published
Last Updated
Get the Dwell Newsletter
Be the first to see our latest home tours, design news, and more.