How to Tile a Wall
It’s all about the preparation. Start tiling on a bumpy or "active" wall with pieces falling off it and don’t be surprised if the result is a little disappointing. The wall should be clean, flat, and dry.
You’ll Need:
Tiles to cover area, plus extra
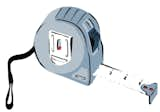
Steel tape measure
Pencil, paper, and ruler
Masking tape
Wooden batten or other suitable length of wood
Standard level
Tile adhesive (premixed or powdered)
Bucket of water, if using
Premixed adhesive
Notched trowel
Silicone caulk and caulk gun, if needed
Tool Up:
Spacers
Tool Down:
Matches
Getting Started
Measure, measure, and measure again. It’s worth drawing areas on paper and checking again before starting. Always buy extra tiles; you will almost certainly get some cuts wrong. Remember to leave spaces for grout and take your time.
To Calculate Number of Tiles Needed
Most tiles come in boxes or sheets enough to cover one square foot. Simply measure the length and width of area in feet and multiply to calculate the number of tiles to buy. Measure alcoves, bays, and L-shapes separately and add to the total. Add ten percent for wastage and mistakes.
What to Do
- Put plugs in the bath and sink and use masking tape to secure them.
- Mark the area on the wall to be tiled, using pencil and wooden batten. Make sure lines are level using standard level.
- If using powdered adhesive, mix it up according to the manufacturer’s instructions.
- Using the notched trowel, spread tile adhesive evenly over one square yard of wall at a time. Use the serrated edge to form ridges.
- Start from the most visible corner and work across, one row at a time, sticking spacers or matches between each tile. Press each tile in place, twisting slightly as you press so that it beds in securely. Check that the tiles are level as you go. Work in sections. If you need a break, remove tile adhesive from areas not yet covered by scraping it off with the other side of the spreader and discarding.
- Cut tiles as you go along.
- Leave adhesive to harden for 24 hours. Finish with grouting and caulk, if required.
How to Nail It
- Always use cut tiles in corners where they will be less obvious.
- Never wash ANY tile adhesive or grout down the drain— it WILL harden and block the P trap and you will have to cut out the section.
Excerpted from DIY Home Repairs: 100 Fix-It Yourself Projects Copyright © 2014 Sarah Beeny and published by Quadrille Publishing Limited / F+W Media, Inc. Used by permission of the publisher. All rights reserved. Design and layout © 2014 Quadrille Publishing Limited.
Published
Last Updated
Get the Dwell Newsletter
Be the first to see our latest home tours, design news, and more.


