
Every aspect of our tableware production, from clay-making to kiln-firing, is done right here in our Sausalito factory. The building was built in 1959 for Heath Ceramics. It was designed by the mid-century architecture firm Marquis & Stoller in collaboration with Edith Heath.

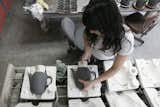
Peek into our factory
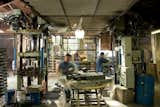
See how we make our dinnerware.
Making Heath Clay
All of our clay is made on-site. It’s mixed with water, extruded, and cut into pieces in preparation for the forming area.
Forming a Bowl
This process is called manual jiggering. An inner profile of a form is pulled down and spreads the clay into a rotating plaster form. Water is sponged on to each piece to smooth the surface. Our automated jigger machines make bowls by spreading clay into a spinning plaster mold.
Forming a plate in the 1950s

This in an archival photograph showing a plate being formed in the 1950's on a manual jiggering machine.
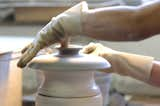
Forming a plate today
This plate is formed on an automated jigger machine. It will remain on the mold until it dries.
Mold making
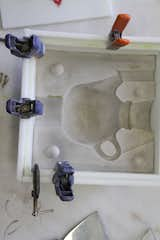
Using a wax cast to craft the custom molds.
Slipcasting complex forms
More complicated and hollow forms are made by slipcasting. Liquid clay (called slip) is poured into plaster molds (that we make on-site). The clay dries for 20-30 minutes, the remainder of the liquid clay is poured out and a "wall" of clay that has already dried remains. Considerable work is still needed to finish the piece as the mold leaves lines of clay "flash" on the piece, and a lot of skill is required to make it look as the design was intended to look.
Pouring slip into the molds
Liquid clay (slip) is poured into the mold until it fills to the top. After a wall thickness dries, the remainder of the slip is poured out, and can be reused in the next pour.
Removing cast forms from mold
After sitting for about half an hour the clay is firm enough that the cast forms can be removed from the molds. More drying is required before the pieces can be trimmed.
Slipcast vases drying
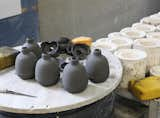
The vases need to be trimmed and wiped in order to remove the mold seam.
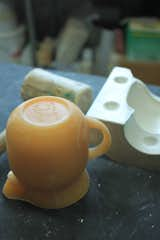
Adding handles to cups
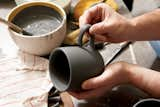
Each handle is slipcast and the cups are jiggered separately. The cup handle is then applied by hand.
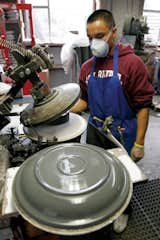
Trimming
After drying, the edges of the plates are trimmed.
Wiping
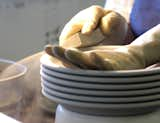
Each piece is wiped with a wet sponge to smooth the surface.
Forming details
Many details require an addition step. Here, a lid is pulled off the wet clay when it is being formed. This handle is for a casserole lid. There is no mold for this piece, so each finished lid has its own character.
Sponging
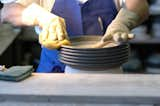
After trimming, the final step before glazing is wiping down the piece with a wet sponge. This smooths the surface and gives it a hand-finished texture.
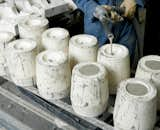
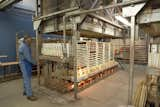
Moving ware to glazing
Trimmed pieces are placed on wheeled carts and moved to the next process. These pieces are trimmed, dry and ready for glazing.
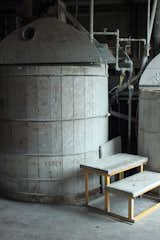
Raw materials, stored for glaze making
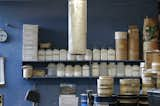
Ware ready for glazing
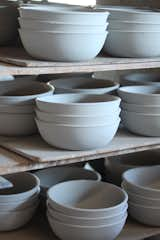
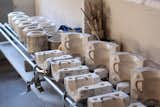
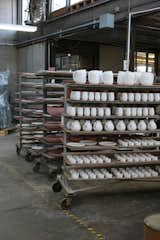
Once dry, the ware is ready for glazing. We keep some stock of all our pieces in greenware (unfired) so that we have them ready to glaze when we need them.
Stored Greenware
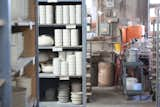
Ready to be glazed and fired, when needed.
Glaze making
We make all of our glazes in house. We mix and test the ingredients in preparation for our glazers.
Glaze testing
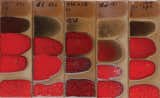
Glaze tests are created by hand to determine the desired application and its gram weight.
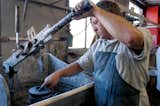
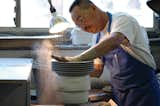
Glazing
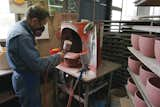
Glaze is applied to the pieces by hand with a spray gun.
Wiping
Glaze is wiped off the edge of a piece to expose the clay underneath.
Waiting to be fired
Formed, trimmed and glazed pieces wait to be fired on a ware cart.
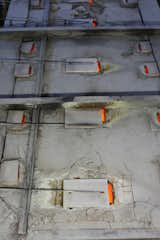
Kiln loading
The pieces are stacked like a puzzle, using kiln furniture, into our top-hat kilns.
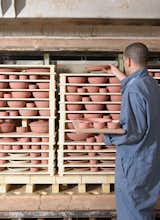
Ready to fire
One of two natural gas-fueled dinnerware kilns (called top-hat kilns) loaded and ready to go.
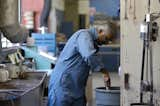
Adjusting the temperature
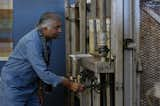
The kilns are adjusted by hand using valves and pressure gauges.
Firing
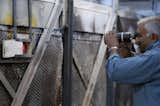
The temperature is monitored with a pyrometer throughout the firing cycle.
Our Kilns
Our kilns were custom built by Brian Heath, when the factory opened in 1959. Today we can fire approximately 400 pieces in each kiln per day. Our kilns fire for about 8 hours and reach a maximum of 2100 degrees. Each firing cycle takes 24 hours.
Monitoring the kilns
Pyrometric cones are placed throughout the kiln and used to monitor the 'cooking' time from inside the kilns.
Finished ware
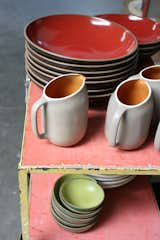
Finished ware, just out of the kiln.
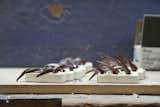
Recycling scraps
Scraps are mixed and worked back into useable clay.
Enjoy!
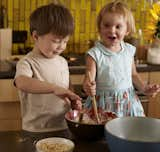
At last, our pieces are enjoyed by you in the comfort of your own home.
Published
Last Updated
Get the Dwell Newsletter
Be the first to see our latest home tours, design news, and more.