Collection by Jordan Kushins
Introducing Home Work
Hello, friends! Welcome to Home Work, a new column on dwell.com. We’ll be visiting artists, designers, and creatives you know and love and introducing you to some whom you haven’t yet met; checking out the latest—and greatest—DIY, crafting, and how-to books; and sharing projects large and small for you to take on along with us. My hope is that each post will ignite a little spark and inspire you to start something new, or give you an idea to add to something you’re already working on. First up: 'Tis the season for sending your love via holiday cards.
Click through to the slideshow for a quick-and-easy way to stamp your very own.
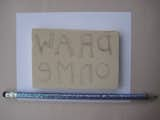
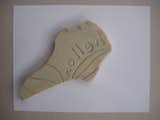
Ah, deciding what to stamp. Here’s where the pencil comes in handy. Doodle around on a piece of paper first just to get a little something down, if you like. For the stamp itself, I always draw straight onto the rubber because I’ve found the less precious I can be about getting things precise and perfect, the better they seem to turn out—so I’m all for putting aside a pattern and seeing what comes to you. You can erase lines you don’t like (just be sure not to etch into the slab with your lead)—just have a go and start drawing. If you’re a newbie, the bigger and less intricate designs will be the easiest to carve. And don’t forget, if you’re using words, you have to write backwards. I have made that mistake many a time without realizing it until finishing my first print. D’oh!
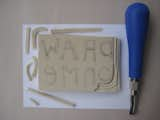
Keep that in mind that whatever you carve away will be inkless. If you want an inky background, carve into the lines of your design, and if you’d rather have your design hold the ink, carve around the line on either side—making it whatever thickness you’d like—and cut away the rest. This may seem pretty basic but I have gotten mixed up myself before and unexpectedly made stamps in reverse-relief. That being said, sometimes the best results come from accidental moments; If you think you’ve messed up, don’t abandon ship. See what you can make of it.
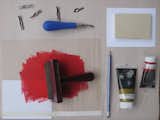
When you’ve got your stamp the way you want it, you’re ready to ink it up.
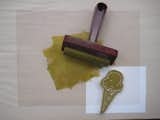
I use a transparency but you can probably use any non-porous, flat surface for the inking. Give a little squeeze of ink in the middle, roll the brayer around until it's covered, then roll it over your stamp. You can also see pretty clearly at this point if you haven’t carved in deep enough in some places (those spots will hold the ink where you don’t want it), so feel free to go back and etch out any parts you forgot.
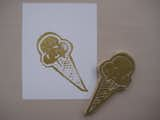
Here are a few testers I did before I started printing on my cards.
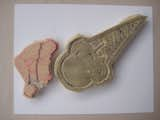
Place the stamp on the paper (you can see a previously failed attempt on the reverse of my cone here). I tap the back a bit all over, just to make sure all the surface has touched, then carefully lift it off without rubbing it around across the card.
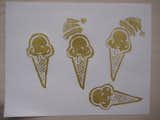
Voila! Success! Re-roll the brayer on the ink and stamp before you use it each time. I knew I was going to have the red Santa hat to add, so I made a bunch of these golden cones, laid them flat all over my apartment, waited for them to dry, then did the next round of red inking on each.
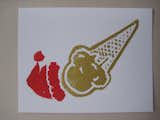
The festive finished product.
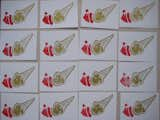
It’s cool when you see your motley crew of prints together because they’re all a little different.
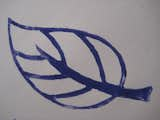
Here are a few others stamps that I have done. Strangely, they’re all flora or fast food. Hrm.

This big burger came very close to being be-Santa-hatted on these cards instead of the ice cream cone.

Works on so many levels.

And this one speaks for itself. Happy stamping!! And stay tuned for further make-and-do fun, including a sneak peek video for Meg Mateo Ilasco's brilliant book, Crafting a Creative Home, a little something special with the always-awesome Christine Schmidt of Yellow Owl Workshop (get her book, Print Workshop!), and adventures in crocheting.