
At a Glance
Experience
- You don’t need to be a DIY whiz.
- But you do need to pick up some power tools.
Budget
- The materials won't cost much—and they'll be free if you repurpose wood.
Time
- You'll spend some time waiting for the wax oil to dry.
- But otherwise, your hands-on time is a couple hours.
To arrange an open shelf is to create a vignette, be it a collection of handcrafted ceramics in the kitchen or artwork, souvenirs, and plants in the living room. "I think there is interest in that—how can I surround myself with things that are beautiful and that I love?" says Keren Richter, co-founder and principal designer of Brooklyn-based studio White Arrow. "And a display shelf is an easy way to do that."
Depending on the space, floating shelves have a variety of uses. "In an apartment, they allow you to think vertically when you want every space to work like a Swiss army knife," says Richter, who’s installed them over a pedestal sink and within alcoves or niches.
"It’s really good for a kitchen, holding a bunch of jars or cups," adds Marlin Hanson, general contractor and owner of Hanson Land & Sea in British Columbia.
In a narrow entryway, a floating shelf can catch keys or loose mail, and in a living room, a ledge can double as a work surface. "It can be a very inexpensive solution to bring in visual interest into a space," Richter says.
1. Locate the Stud

No more knocking on drywall—use a stud detector to locate where your floating shelf is going to be secured. Just be sure you don’t drill into any plumbing or wires.
You want to secure the floating shelf against a solid structural material, like a wooden stud in the wall, to ensure that it holds properly.
"That’s the trickiest thing—if you do it incorrectly, it could easily rip out of the wall," Richter says.
Use your stud detector to find wood beams hidden in your walls. Another option is to mount the shelf above a window. "There’s a header there, a solid backing in the wall," Hanson says.
Also, be aware of what is hidden within the wall. You don’t want to drill into existing plumbing and wires. Some stud finders also detect wiring, but you also can determine where wiring is by looking for plugs and switches along the wall.
2. Trace a Straight Line
Once you find the studs, use a pencil to mark their location on the wall. Get out a laser or level and, using a pencil and yard stick, draw a line where the shelf’s centerline will fall on the wall and then mark the stud locations on the centerline. This ensures a level shelf installation.
Once you figure out the length between studs in the wall, you can determine the exact length to cut your shelf. If you're installing multiple shelves, perhaps to create an open bookshelf, Hanson recommends "spacing to suit design": Plan for enough vertical room between shelves so you can properly display your possessions.
3. Cut and Shape the Wood Boards

After you’ve marked where the studs are on the wall, it’s time to cut your boards to length (you can also trim the depth if you need). Any type of wood will do as long as it’s about 1.25 to 1.5 inches thick.
Any type of wood can be used to create open shelving as long as it’s 1.25 to 1.5 inches thick, so it can be secured to the wall with lag bolts. "I use Douglas fir, but you can use a harder wood like a maple," Hanson says. "Salvaged boards are good."
If you want to use an easily accessible wood like plywood, Hanson suggests gluing two 3/4-inch pieces together for a finished thickness of 1.5 inches.
Using a chop saw or skill saw, cut your shelf to length. If the wood board has too much depth, use a table saw to cut it to the appropriate depth. Hanson recommends six inches of depth for a three-foot-long board, and eight inches of depth for a four-to-six-foot-long board.
If you want to round the corners of your shelf, use a jigsaw to cut off the sharp ends. "I put a tight round over on my corners," Hanson says. "That’s just for looks."
4. Sand and Seal the Wood
Using a palm sander, start sanding the boards. "I use 80-grit first to clean it up and knock off the fuzz, and then I use 220, which is a big jump up, and that gets it smooth to the touch," Hanson says.
Dust off the wood fuzz and use cloth to apply a light, even coat of Osmo Polyx-Oil wax to keep the material water-resistant and durable. "It has a really nice feel to it," Hanson says. Let the shelf dry for 8 hours.
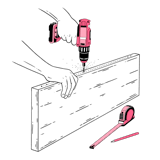
5. Drill Holes Into the Studs
Where your stud locations are marked on the centerline, drill the two 3/8-inch lag bolts into the wall using a 1/4-inch drill bit. For a shelf that is three feet long and six inches deep, you will need two 3/8-inch lag bolts. For a larger shelf—say, six feet long by eight inches deep—you’ll need four 1/2-inch lag bolts. "You want to be nice and level with your drill, going into the hole," Hanson says.
Using the socket set, tighten the lag bolts into the wall until they are halfway in, and then back them out of the wall. "Your lag bolt is like a screw, and it’s threaded," Hanson says. "You want to cut its grooves into the wood [stud]."
Clamp the lag bolts in a vise and, using an angle grinder, cut the heads off of the lag bolts. With threaded holes in the wall, the lag bolts can be screwed in with ease. Using the vise grip, wind the lag bolts back into the holes.
"Now you basically have these metal lag bolts poking out of the wall," Hanson says. "Eyeball it to make sure you got them straight, not cockeyed." If they’re crooked, gently knock them into place with a hammer.
6. Drill Holes Into Your Shelf
After you’ve drilled the lag bolts into the stud, drill holes where they’ll hit the back of the shelf with a 3/8-inch drill bit.
Along the back edge of the shelf that will be resting against the wall, draw a line horizontally down the center with a yardstick and pencil.
Place your board against the lag bolts sticking out of the wall and mark where they hit on the centerline on the back of the board.
Where your lag bolt marks are located on the back of the board, drill holes with the 3/8-inch drill bit, being sure to go deep enough to accommodate the lag bolt.
7. Slide the Shelf Onto the Lag Bolts
"It’s a tight fit and holds without fastening," Hanson says, and adds that although it is pressure fit, you can use glue or construction adhesive to further secure the lag bolts in the holes, if you prefer.
8. Apply a Final Coat of Wax Oil
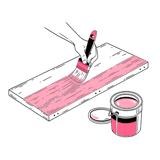
Slide the shelf onto the lag bolts and apply another coat of Osomo Polyx-Oil wax.
After the shelf is installed, apply another light, even coat of Osmo, and let it dry for 8 hours.

Those pet glamour shots have never looked better than on your new floating shelves.
Published
Last Updated