Dwell Made Presents: DIY Plywood Media Console
In this episode of Dwell Made, Chris Salomone of Foureyes Furniture builds a modern console out of plywood.

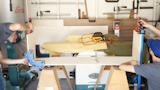
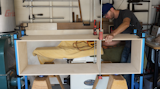
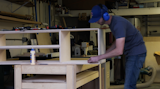
The easiest way to make the cuts for this project is with a table saw. If you don't have one, you could also do it with a track saw, or a circular saw and something with a straight edge to use as a guide.
In total, you'll want to cut five pieces in this step: a top, bottom, two sides, and a vertical partition.
The top and bottom pieces are 60" x 16". The sides and vertical partition are 17" x 16".
Step 2: Assemble Pieces
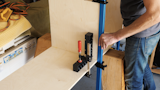
You could assemble the pieces you've cut so far using nails, screws, or (like me) glue and clamps. In any case, start by attaching the two sides to the bottom.
Next, attach the vertical partition to the bottom.
Finally, attach the top.
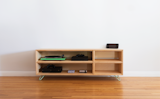
Step 3: Cut Shelves
You're going to need two more pieces are that 16" wide (like the exterior) pieces: a short shelf and a long shelf that will go on either side of the vertical partition. I could tell you the finished length, but if you stick to that too strictly, you could mess things up. Mine were about 39.5" long and 19.5" long, but it's best if you measure the opening and use that to determine your lengths.
Step 4: Cut the Rest of the Interior Panels
The rest of the panels will all be 15.5" wide. Because they are 1/2" narrower than the exterior pieces, it will create a "stepped-in" look. In total, you need to cut 16 pieces.
It'll get confusing to name them here, so it's best to reference the drawings or the video.
Step 5: Assemble Interior Pieces
Again, it's easiest to understand this order by referencing the video. In general, though, cut to fit. I like to err on the side of too long and slowly nibble away at my pieces until they fit just right. It's best to use glue and clamps to install all of these pieces.
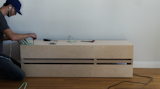
Step 6: Attach Back
The piece will be perfectly strong without a back, but if you want to hide cords, etc., a back is a good idea. I used two strips of 1/4" Baltic Birch plywood, leaving a gap to feed wires through.
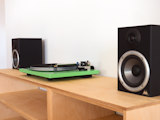
Step 7: Sand and Finish
I sanded using 180-grit sandpaper. It's probably easiest to pre-sand some of the interior pieces before you install them, but depending on your sander, you might still be able to fit it after assembly. After sanding, I applied two coats of General Finish Arm-R-Seal in a satin finish.
Step 8: Attach Legs
I used 4" Hairpin Legs from DIYhairpin.com. A lot of people stick these things right at the end, but I wanted mine inset a bit. I just used the legs to equally space mine. Basically, I took one of the legs and placed it right at the corner, then inset another leg on that and marked my screw holes...then I screwed them in.

Get the Dwell Newsletter
Be the first to see our latest home tours, design news, and more.