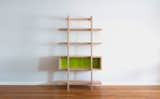
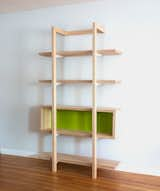
Dwell Made Presents: DIY Back-Off Shelving System
In this episode of Dwell Made, Chris Salomone of Foureyes Furniture builds the back-off shelving system using ¾-inch, baltic birch plywood and double-slotted, heavy-duty shelf standards.
Key Products
2 sheets of ¾-inch baltic birch plywood (or other if desired)
2 double slotted shelf standards, 78" long
8 heavy-duty, double-slotted shelf brackets, 10" long
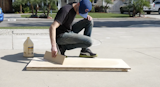
Step 1: Break Down/Build Up Shelves
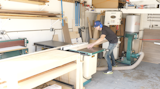
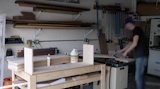
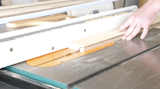
We're going to be building this whole project out of two sheets of ¾" baltic birch plywood, two pieces of 78" double-slotted shelving standard, and eight shelf supports. A lot of the plywood pieces are going to be laminated together to make them into inch-and-a-half-thick pieces, so I started by breaking down my first sheet of plywood into oversized versions of what would become the shelves, so that I could glue them up and then trim them to their final dimensions a little bit later.
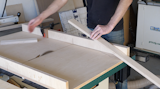
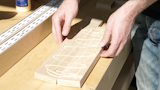
Now, admittedly, I'm not that great at following building instructions—in fact, I had never done it before, unless it was a plan that I made myself...so already right here I'm messing up a bit. I should have actually made the shelves out of four pieces instead of two like you see below, so that when the whole things come together, these gaps would conceal the shelf supports. I didn't realize this until it was far too late.
Next I continued breaking down the plywood into the rest of the pieces that I would need in order to complete the box, and the frame that's going to hold it all together.
Step 2: Break Down/Build Up Structure Pieces
With everything cut down to a manageable size, next I ripped four long strips that will become the vertical portion of the frame. We'll come back to those in a bit.
And I also cut the pieces that will become the horizontal part that attaches to the wall. By this time, the shelf pieces that I laminated together in the beginning were dry enough that I could trim them to their final size.
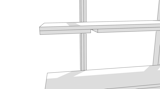
Step 3: Building the Box
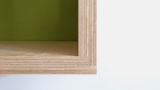
In this finished shot, you can see how the box will be formed by creating rabbets due to the fact that the outside pieces are all longer than the inside pieces by an inch-and-a-half...or the thickness of two pieces of plywood. This makes for a really strong joint, and, in my opinion, a really cool-looking one thanks to all the plywood layers. So with all the pieces cut, I started assembling. First, I laminated the inside bottom to the outside bottom pieces, leaving ¾ of an inch on either side.
Next I attached the two outside side pieces. You can see I used a couple of screws on the underside here, but those won't ever be visible unless you're viewing it from the ground for some reason.
From there, I laminated on the two inside side pieces followed by the inside top pieces.
And last, but not least, the outside top piece.
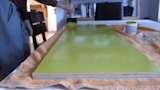
The only other thing to note is that I left the two inside side pieces a little short, so that there would be a pocket to install a back panel into. That's what you see me cutting and fitting in this shot.

Once that was fit, and before calling it a night, I brought the back panel inside and put a coat of this greenish-yellowish paint, and then I did a second the next morning. I know it doesn't look great here, but when the whole thing is assembled, it really adds character to the piece.
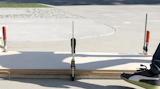
Step 4: Cutting In Slots For Shelving Standard
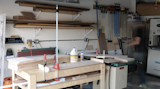
Back out in the shop, I set my saw blade to the depth of the shelving standard, and then I set my fence and took a pass on the edge of each of my vertical frame pieces. These are the recesses that the shelving standard is going to fit into. Once I verified that they were cut in the right location, I turned them on their faces and made another pass to clear out all of the material.
Once those were dry, I could install the shelving standard which is just a matter of driving in a few screws.

Step 5: Horizontal Structure Pieces
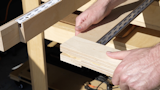
And then I turned my attention to the horizontal piece that'll form a right angle with the vertical pieces. You can see in this shot that one side is longer than the other; the same is true for the vertical pieces. This is going to form a half lap to make that joint stronger.
After a little clean up, the last thing to do was glue in this piece that ties the two assemblies together in the back, and that you can use to anchor the whole thing to the wall.
Finally I took the whole thing inside and assembled it.
Get the Dwell Newsletter
Be the first to see our latest home tours, design news, and more.